Adventures in home installation -- D to the rescue...
So today my gas dryer that I ordered online at Costco.com finally arrived via Whirlpool Delivery Express. When my housemates and I were dividing up who was contributing what to the household (in terms of material items), I foolishly chose some of the more expensive items, such as washer+dryer, vacuum, rugs, etc. We chose to do it this way rather than split the costs so that when people left, there would be no issues with them taking big purchases with them. I already had my grandma's old Kenmore 90 series washer, so what the big things I had to shell out for were the gas dryer and Dyson vacuum (more on that later).
Now the closest Sears didn't necessarily offer home installation of gas appliances, and neither did the Costco. So I tried looking for hardware people online, and then realized I had a hardware nut in my lab (D). I asked D if he knew how to install gas dryers, and he said yes, and he graciously offered to bike to my place and install mine.
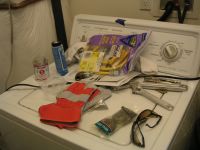
Friday adventures in installing a gas clothes dryer -- some of the necessary installation extras that didn't come with the dryer
Gas dryers don't come with everything you need to install them. You'll need some wrenches, some rags or gloves, pipe thread sealant, and of course a flexible gas connector (with proper fittings on the end) to connect up the gas part. I also purchased a "leak detection" solution for the gas leak detection test, although I've heard people mostly just mix up dishwashing liquid and water. The reason I bought the actual "leak detection" solution was to make absolutely sure whatever I used was noncorrosive. Oh yeah, a 90 degree black iron elbow connecting the gas dryer and the flexible gas connector was an optional purchase D recommended.
You can't really see it here, but I also had to buy new hose washers for the washer's cold and hot water hoses. D recommended this since even though the hoses looked in good condition, the washer was still a hand-me-down, so 4 new washers for the hoses were called for.
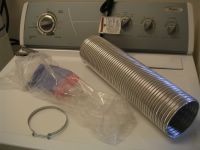
Semi-rigid drying duct; don't use the crappy thin foily stuff
The last important item needed was the dryer duct. Don't use vinyl or the really cheap, flimsy foil stuff. I noticed that in the coin-operated laundry rooms around my apartment they had used the cheap foil-looking stuff. D said he prefers the duct to have a special end fitting that fits directly onto the exhaust vent without clamps, but in my case all I could find at the local Home Depot was the kind with the clamps.
D also had me purchase a 90 degree 4" elbow, to connect from the back of the gas dryer to the dryer duct. It wasn't really necessary, but a good solution for keeping the dryer duct straight and less likely to kink.
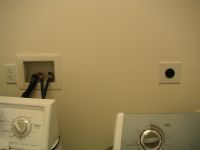
Washer, hookups in the back, plus big electrical socket for electric dryer
This picture shows the wall where the laundry hookups are. Note the 4-prong, 3 pole electric outlet that an electric dryer would hook up to. To the left of the wall are the washer hookups and normal outlets that the washer and gas dryer electrical plugs plug into.
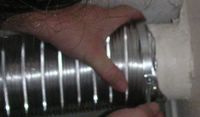
D securing the dryer duct to the wall outlet
After putting the feet on my dryer and leveling it, D cut the 8 ft dryer duct into 2-3 ft, then secured the duct to the wall exhaust vent.
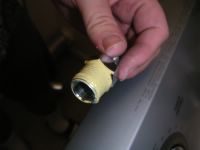
Pipe thread sealant applied by D to the connector
Next, D applied this goopy yellow pipe thread sealant to certain areas of the gas connection between dryer and gas valve. Note that he did not put any pipe thread sealant on the flare connection directly between the gas valve and gas connector.
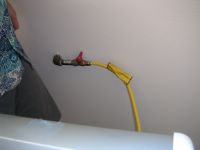
Flexible gas hose connector, now properly connected to gas valve
Here we have a picture of the final gas connection.
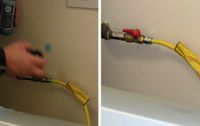
Left: D applying leak detection solution (basically like a diluted dishwashing liquid); Right: Checking for bubbles
Then D applied the blue soapy leak detection solution to the two ends of the flexible gas connector. Only the connection to the gas valve is pictured here. Then we waited for bubbles to form. None appeared; the only bubbles that were there were the ones that were there originally due to the leak detection solution being shaken up. However, no new bubbles popped up. Yay, dryer properly installed now, courtesy of labmate D!
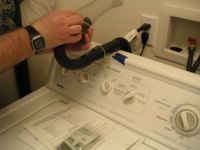
With gas dryer installed, D now installing lint catcher at end of washer hose
Finally, D put the new hose washers in the hoses and tightened the connections for the washer. He also graciously installed the lint catcher on the end of the drain pipe. Then, after putting the washer and dryer through their paces, he pronounced everything was well and rode away on his bicycle.

0 Comments:
Post a Comment
<< Home